I just watched a very interesting flick called “Craigslist Joe”. It was about a young man who traveled cross country for 30 days with nothing but a laptop, a cell phone and the clothes on his back. He found rides, places to stay, food, and ways to contribute to society along the way just by ads on craigslist.

He wasn’t just a taker. He contributed. He left a mark wherever he went. He helped. He was willing to clean, teach, console, party, and life live where ever and however it was unfolding at the moment.

I couldn’t help but think of our homeless population. I have cared for many of them during my years working in hospitals. I always have a heart for those that face struggles in life. I feel a kinship I suppose. Anyhow, this movie made me think of those that I’ve tried to help.  More than once I’ve worked at finding a place to heal, to find hope, to open new doors for a fellow man that is struggling with life on the streets and addiction . My experience is that unfortunately they don’t want to open any doors. They don’t want anything different. They don’t want to contribute. The homeless (and mostly addicted) population that I have met and tried to help want what is given as long as it is given under their code of conduct. NO RULES ATTACHED. The don’t want to have to respect your house by keeping things clean. They don’t want to have to contribute anything unless they feel moved to in the moment….meaning no scheduled work or chores. They don’t want to honor the fact that you have to get up in the morning and so noise needs to be down at a respectful hour. They would rather face the elements and do what they want whenever they want the way they want. That was my experience. It kind of soured me to wanting to help those that are on street corners.

Yet, in this short memoire, this young man showed that “homeless”doesn’t have to mean helpless. It isn’t just a “take what you can get” mentality. He showed that you can find kindness in people if that is what you are willing to share with them. He found that he can give of his talents and resources as well as be the one in need of housing and a meal. And that the barter system does work.  A person doesn’t have to sleep on the streets night after night if they are willing to be real and share and care.

I love when I am able to see things from a different perspective than that with which I was raised and taught. It’s not a JOB or a degree or contacts that make or break you. It’s what you have to offer the universe and if you are able to trust the powers that be (for me that would be God) to direct your path and provide for your needs.

I need to be inspired now and then. I need to feel good about the world I live in. I”m thankful that I mostly see the good in people. I grateful I still have much to offer the world, even if it isn’t in the way I was taught was the only way to make it. I can’t work a JOB right now…but I can still make a difference. With a smile, with a phone call, with a hug and a smile. I can bake a cake for a birthday or offer someone a meal. I can share a story or buy someone a cup of coffee. Some how…life works if you are willing to share. That means giving as well as receiving.


The year of the chickens.

A year of learning.  About chickens and eggs and what goes with them.

What came first?  For me it was chickens..but for some it's the egg!

What came first? For me it was chickens..but for some it’s the egg!

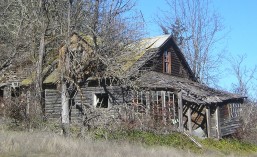
What came first, the chicken or the egg?  Well, at my house that is an easy question to answer.  The chickens came first. It was a year ago to be exact!  One year ago this week  I went and brought my first flock to live with me on the farm I lived on out in Applegate.

I caught the chicken bug the first month or so of 2012.  I had been told where I had been living that I was going to have to wait at least until spring of 2013 before my desire would come to fruition. Then, the end of the summer of 2012, I moved.  I no longer had any constraints to keep me from getting the object(S) that my heart desired.  My landlord gave me the thumbs up and I went to work cleaning out and renovating an old coop that was next to my barn apartment.

It was my first time doing any construction of any kind.  Fortunately I had a friend who came to help.  He brought his tools and his strength and his knowledge, but the ideas were all mine and I did my fair share of measuring and cutting and hammering and setting screws. Of course I had cleaned the coop out before we started renovations.  There was old straw and chicken poop all over that needed to be shucked out and scrubbed down and disinfected.  That’s right.  I learned you need to disinfect the coop when you are going to be bringing in a new flock.  So…it was sprayed down with Basic G from Shaklee and I let that dry for a couple of days before adding bedding.  I decided to do the deep litter method using straw on the bottom and pine shavings in their nesting boxes.  Every so often I would add more straw and also some shavings to the floor.  I had no smell and didn’t have to clean the coop from October to May.

I had never even held a chicken before the day I went to pick them up.  The gal I bought them from was going through some really rough times and needed to move her kids to California and couldn’t take the girls.  She was so sad about it and I did the best I could to reassure her that they were going to be loved and loved and loved.  And they were.

So, things I had learned before I even retrieved my girls was that they needed to have a place where they were safe from predators, especially at night.  They needed their coop to be dry and not have chilling drafts.  They needed food specific to their age and calling in life (mine were on Layer Pellets) and fresh drinking water.  I had read they needed to have roosts and laying boxes and ladders to get up in the boxes and special treats and lots of other things.  I quickly found out they don’t.  The will find anywhere to roost or sleep if they feel safe and the same can be said with laying eggs.  But I made sure my coop had plenty of laying baskets and they had plenty of roosting space and a locked coop for night-time.

I had decided I wanted my Layers to be free ranged.  That means that they were free to roam as far as they chose to.  Since we lived on a 13 acre piece of property they had quite a wide expanse of territory.  They mostly stayed in the 3 acres close to my barn apartment and the main house.  While letting them free range during the day does increase their risk of being struck by a predator, I felt it was a more natural and kinder life for them.  I did loose one of my hens to a hawk about three months after getting them.  RIP Grace.  I realized that was part of the deal.  Life and death.

So, the chicken came before the egg, but once the eggs started….woah Nellie did I have eggs!  It only took a few days from their relocation before I think each Layer had laid at least one egg.  They do not lay an egg EVERY day.  Each breed has an approximate number of eggs they will lay in a lifetime.  Most of them lay an egg about every 24-30 hours during their peak laying years.  So with a Bakers Dozen girls I would get about 5 dozen eggs a week when they were all in prime laying.  I have learned that their laying habits can vary based on many things.  When they molt (lose their old feathers and grow new ones which occurs once a year) they generally don’t lay.  Some chickens have a hard molt and they look pretty rough.  Miss Donna, my Golden Laced Polish hen, hardly looks any different during her molt, but she hasn’t given me any eggs during her molt.  I’ve also learned that stress will decrease egg production. Decreased light will also cause low productions.  Over the hardest part of the winter I was only getting one egg every other day per hen.  Also, this summer when we were having so much smoke from our fire season and the temperatures were soaring above 90 degrees and into the low 100’s for weeks on end, I did not have good production.  Moving them stresses them.  Adding new chickens to the flock is stressful.  Essentially I have learned that hens like things to be constant and the same and not to be upset if you want to have good output.

My girls and their eggs have brought so many new and wonderful things to my life.  I started my community Facebook page and have met so many interesting and knowledgeable people who enjoy chickens and sustainable living and healthy eating and many things I enjoy also.  I started doing this blog and the Layers and Littles, or their eggs, had a star role often.  I sold some of my eggs, which led me to meet others who sold eggs and had chickens.  And of course…with all those eggs…I did a LOT of egg cooking.  I made stuff for myself and for others.  The eggs became the basis for my Barter Basket that was my payment for my physical therapy once a week.

This slideshow requires JavaScript.

About 4 months after becoming known as “that crazy chicken lady” by my friends, I bought some day old chicks.  I decided I wanted to start from scratch.  My first batch was 2 Silver Laced Wyandottes (SLW) and a Welsummer.  The following week in February I bought a pair of Speckled Sussex (SS).  My landlord bought 35 babies and let me tell you..that many babies makes a real racket and a stench if you don’t keep up on them. My five Little’s were kept up in my apartment with me until they were 5 weeks old.  I just used a clear plastic tub and had their food and water and a heat lamp hanging above it.  You have to help keep them warm, so a heat lamp is the easiest and least expensive way to do it.  From the first week of having the SS chicks I knew they were different.   From each other that is.  There was just something about them.  Low and behold, about June, the one that had a bit larger comb began to crow!  I had a pair that I could breed and I was excited to think about hatching eggs.  I had a rooster!  And what a handsome cocky boy he was.

I started introducing the Littles to my Layers when they were about 6 weeks old.  I would take them outdoors and have them in a pen where the big girls could get a look, but not get at them.  Then when they were about 12 weeks old I moved them to the coop, but kept them sequestered in an area of the coop to themselves and only let them out when I was in attendance.  I did this for about a week and then one evening after they had all been outdoors for the late afternoon, I let them all go in to find their spots at bedtime and they all just were together after that.

Then life changed and I needed to move.  To town.  I knew I couldn’t bring a rooster to town and so I relocated Pumpkin and 5 of my older Layers with someone out in the country.  I  packed up the 4 Littles and Miss Donna and Sweetie (she’s an Austrolop) and brought them to town and they joined my boyfriends motley crew of 14 hens.  We ended up rehoming 8 of his and were back down to just a dozen.  They haven’t been as happy here and our production as been down.  They have to be in an enclosed chicken yard and I don’t think they like that as much as running free.

I have learned that chickens LOVE treats.  In the winter I would give them warm oats with apples or raisins in them.  Sometimes I would add some scrambled eggs for extra protein.  Some people think you shouldn’t give chickens eggs or chicken meat.  My girls love both!  They have yet to show any signs of cannibalism, but they love having some warm scrambled eggs on a cold morning.  I also started growing and giving them sprouts when they weren’t getting out to free range.  They also like scratch, sunflower seeds and fruit and veggie scraps.  My girls get a wide variety of diet with their base being Organic Layer Pellets from the Grange.  I love using the bags to decorate their coop as well as I used them to line planter boxes this summer!

A few other things I’ve learned this year about raising chickens.  Sometimes you forget that you’ve put an egg in your pocket and it gets squashed.  Sometimes they don’t have “fluffy butts” but rather have nasty butts and need to get a good washing!  I wasn’t sure, but I found out that they will go out in the snow.  And they LOVE to take dust baths.  Those are just a few things I learned just by watching and enjoying my girls.

We inherited two new pullets a month ago.  My boyfriend’s cousin raises Blue-Laced Red Wyandottes and we are hoping when we are able to move back out to the country that we can start breeding them.  They are a beautifully marked bird and I have read about many  people who are trying to fine tune the breed so it can be added to the American Breed Standard.

Our Blue-Laced Red Wyandottes...all the way from Utah!

Our Blue-Laced Red Wyandottes…all the way from Utah!

So, while the chicken did come first for me, the eggs will be coming for quite some time.  And what does that do for me the most???  It makes me smile.  I love my chickens.  They fill so many areas of my life.  They give me food.  They are one of the things I do in my life towards being self-sufficient.  They are a wonderful conversation topic.  They have brought me new friends which has opened doors for many other new things.

My next post will explain why I need them.  You see…production is at an all time low for me.  And I’m not talking about eggs.  Check back soon and see what I mean about low production!  Thanks for reading friends.  Now go pet a chicken or eat an egg!  It will improve your day…trust me…I know it for a fact!

REnew, REuse, Recycle…the birth of a new coop for our girls!

Sweetie peeking through the fence, wondering "what's out there?".

Sweetie peeking through the fence, wondering “what’s out there?”.

I have moved into an abandoned hoarders’ house.  My boyfriend moved here first.  I will post about some of the transformation we have accomplished later.  This post is about the new home for our girls.

Prior to moving here, I had a dozen chickens.  My boyfriend had 14.  He re-homed 8 of his and I re-homed 6 of mine and so we blended an even dozen.  No roosters! We live in the city limits. I had to get rid of my beloved Pumpkin who I had raised since he was days old.

Now, try to imagine a corner city lot with an 1800 square foot home that is completely filled with stuff!!!  The house had paths from the doors to the various rooms.  Two of the three bedrooms were filled with stuff to the doorway with one of the rooms impenetrable.  The outside was similar.  There is an extra long driveway/patio that has debris completely filling it except for a parking area near the roadway.  The backyard, and side yard were full of garbage and debris.

coop 11

The makeshift coop in the back of the house under a bunch of overgrown trees and grape vines. Piles of garbage and debris on both sides! It’s only 4 feet tall.

When my guy moved here and brought his chickens he built a makeshift coop/run.  It worked.  It wasn’t easy to access for cleaning.  It was dark because it was in the over run jungle of a yard.  The girls did not seem happy.  I wasn’t happy about where they were.  I wanted a place where I could hang out with them when I wanted to.

After 3 months of working on getting the inside of the house livable, it was time to make a new spot for the girls.

We cleared out an area, shoving all the garbage and debris into a pile on the side yard.  We will get it hauled away later.  I will tell you more about debris and having things hauled away in another blog post.

Now, my guy, he can throw anything together and make it work.  So he starts piecing this 8ftx8ft square together.  He calls me out and asks me to hold a couple of boards up while he screws them in place.  I had no idea he was going to do this over Labor Day weekend until Sunday morning when he stated his intentions.  So while he is sorting through the various piles looking for pieces of lumber, I start thinking about what I want in a coop.  What do we have that can be used that we want to get out of the house?  I am always looking for ways to get rid of things that are still in here.  I remembered an entertainment center that I thought would work as a place for nesting boxes. I emptied it out (it actually had a few salvageable games like Trivia Pursuit and Monopoly in it) and cleaned it up and the guys hauled it out.

Walls were put up.  A window (I have a few from a 1902 house that I have moved with me two times now with hopes of building a greenhouse SOMEday) was installed.  A light was found and installed.  An old door was found and it too was installed so that we can actually walk into the coop to attend to the girls.  That is a real nice change from the makeshift coop I’ve been entering all stooped over because it’s only 4 feet tall.  I can go in and collect eggs fully upright!  I like that.

Time to move some more debris out of the way.  We fenced in an area for a run. This isn’t being built with the intention of it being a permanent structure. It is just for the year or so we intend on being here.  The guys didn’t bother to dig holes for posts, they just built the fence with scraps of lumber and added a little picket fence gate because I liked it and wanted an entrance to the yard for hanging with my girls.

I asked for some roosting bars, a ramp for them to access the nests at the top of the entertainment center and of course the pop door for the girls to get out of the coop and into the run.

There are plans of rigging up a pulley system for opening and closing the pop door, but we ran out of steam and time.  The weekend is over and it was time to get some dinner ready and prepare for the work week and the young man of the house has school tomorrow!  It is his senior year.  I’m sure he would have rather spent this last weekend doing something else, but he helped his dad and learned how to build something useable out of what many would have considered junk.  I am proud of them both and grateful for the wonderful new housing our chickens have.

Oh, and we also have 2 new chickens that arrive last week.  They are Blue Laced Red Wyandottes that were brought here from Utah on Monday.  My boyfriend’s cousin raises them and we hope to become Wyandotte breeders eventually.  So these cute girls (Baby Blue and Big Blue) are our beginnings!  And this mess of a house that we are making into a home is my guys’ and my beginnings.  I think we are doing pretty good so far!  We are making a home for us, for the last kid living at home who is soon to fly the coop and for our feathered kids!  It is going to be a heck of a year in what I had called “Hoarder’s Hell”, which is quickly becoming “Our Haven”.

Waste not, want not…using what I have!

 DSCN0802

Last week I responded to a local ad regarding a bartering offer and I ended up being gifted some plant starts.  A very kind woman took me to her greenhouse and explained how some things in life had been challenging this spring and she wasn’t going to be able to market her plants.  The “need” in the barter request was being fulfilled by another resource.  She said to take any starts I thought I could use or would want since I had responded to the ad and been willing to do the barter.  There were hundreds of tomatoes and peppers of all kinds imaginable.  Various herbs.  It was a wonderful place for me to be…just standing there in that greenhouse with such beauty in the bounty of food all those plants represented.

I tried to be realistic.  I thought about what I could and would do with tomatoes and peppers.  Salsa, spaghetti sauce, canned tomatoes, dried peppers.   I ended up with about 15 tomato plants and the same amount in peppers.  I had 6 pony packs which had cilantro, parsley, fennel, basil, another parsley and another herb that I am unsure what it is.  I think there were 3 squash plants that when I saw them at first I thought they were geraniums.  Might still be geraniums.  These plants aren’t marked. The woman had left me alone and said to help myself.

Butterfly pepper

Butterfly on the pepper plant in the garden.

Because I lost last years garden bounty, I have been hesitant to plant all my seeds and starts in the ground.  I am a renter, and I am anticipating I will be leaving here at some, I just don’t know when.  I was offered a place to garden in one of the many growing areas on this property and I utilized that.  A couple of days ago I planted 6 tomatoes and 5 peppers and 3 pony packs of the parsley and cilantro and basil in the area I cleaned out to use .  I still had LOTS more to plant. I wanted to have a mobile garden.  One I could take with me if I were to move before harvest time.  I did have some black pots I have acquired as well as I intended to make planters with old pallets.  I have been collecting some pallets over the last few weeks.  Figuring out how to use them was the next line of thought.  That was my goal this afternoon.

Do you know how hard it is to dismantle old pallets?  They are put together to STAY put together. The have a bazillion nails in them.  Nails that aren’t easy to get out. I took apart 2 pallets a few weeks ago and realized I just don’t have the strength to do that kind of hard repetitive work.  So I had to figure out a way where I would just cut them without removing the nails.   After numerous searches on the web this is what I came up with.

I cut the pallet into three pieces.  I then cut to size and nailed into place some empty feed bags.  I have used these feed bags to add decor to the walls of my coop also!  The shorter ones are filled with organic potting soil and planted with the herbs.  As a “filler” in the taller one (to conserve on the cost of plant mix) I went and scooped up some of the old straw/shavings/chicken poop that was scattered after the last two cleanings of the coop.  The bottom layer is 9 months old and really breaking down well.  The top layer is still fairly dry and has been sitting for over 2 months.  I believe that anything sending roots down further than the 8 inches will find that the stuff underneath has broken down more and will allow for nice long root systems.  Another experiment for me to monitor.

I did the same trick on the big black pots I used.  I filled them about 1/2 full with the partially composted coop mix and then topped them off with the Organic Plant Mix.  I worked until I ran out of the 2 bags of soil I had and it was almost dark.  I think I planted about 14 pots.  Some of them have double duty with more than one plant in it.  It felt so good to accomplish this.  I have been very slow to get going with planting a garden of any type, and yet when God provided all that I needed to do so, I had to get out there and do my part!  I am grateful for this woman’s generosity.

IN the midst of doing this planting I realized I had not eaten anything except for the Latte I had treated myself to when I was running errands in town.  I had received a FREE coupon a week ago.  Free is always good, but that free drink wasn’t going to give me the energy I needed to get this job done.  I had no ideas of what sounded good.  I just needed food.

What I had that needed to be used

Peppers, onion, Portabella mushroom, mayonnaise, avocado, fresh tomato and potato, basil, Organic Seed Bread, Mozzarella cheese

I opened up my little fridge and started searching.  What you see in the picture is what I pulled out  that needed to be used so it wouldn’t go bad or to waste over the weekend.  There were 3 peppers and a little bit of red onion that was left over and then the Portobello mushroom that my friend had given me the other day.  Hmmm…a sandwich sounded good….what kind could I throw together with this stuff?  I continued to rummage and found the little bit of the homemade mayonnaise with avocado added I had made last week and it was still good, but wouldn’t be for much longer.   My boyfriend had said something about a Philly Beefsteak Sandwich earlier and those peppers and onions triggered the idea into action!  An epic Portabella Philly Sandwich was about to be born!  A sandwich of this magnitude needs to be served with some chips.  But I didn’t have chips.  Yet I had bought an organic russet just today on my trip to Cartwright Meats.  I had also bought 3 of their Bacon Wrapped sirloin with hopes of a BBQ over the weekend.  They are only $3.49 each every Friday!

The chips: Turn oven to 450 degrees.  I used my stoneware bake pan and heated it also during the preheat time.  The chips were made by slicing on a mandolin and soaking in rice vinegar and water brine for 20 minutes. I drained the water off using a salad spinner to get them really dry! This was some good exercise for arms!  Then I drizzled some EVOO on and made sure all the slices had some oil.  I sprinkled Mrs. Dash Fiesta Lime blend all over the chips.  I opened the oven and spread them out as single level as I could.  I cooked for 10 minutes and then turned them and cooked another 10 minutes.  This was the perfect amount of time to make the sandwich.

This is how the sandwich was made!!!

Slice 1/2 red pepper, 1/2 green pepper and 1/2 small red onion.  Saute in cast iron skillet on medium heat in 1 tbsp. EVOO until onions are carmelized.  Remove from heat (I used my 12 inch cast iron and only put 1/2 the pan over heat so I just pushed the pepper onion mix on the unheated side to keep warm).  There should be just a small glaze of the oil left seen in the pan..it’s barely there. Slice washed and stemmed mushroom and lay sliced into hot pan.  Put one slice of Organic Seed bread in the toaster.  Turn the mushroom after about 1 minute when it is just seared.  Spread lightly with homemade mayo.  Stir mushrooms with peppers to combine all in pan and add 3 sprigs of fresh basil and cook one more minute. Take off heat and squeeze half a lime over the entire pan of food. Scoop onto toasted bread.  Place 1 ounce sliced mozzarella cheese on top of grilled veggies and place under broiler until cheese is melted.  Add sliced tomatoes and a spread more of the mayonnaise. Top with avocado and a sprinkle of fresh ground pepper and sea salt.

Portabella Philly Sandwich

Portabella Philly Sandwich

I hope you give this a try as a substitute for the traditional Philly Steak Sandwich.  The only thing I will change in my recipe for next time is to have a nice hoagie roll instead of the seed bread.  This has some juiciness to it and the bread didn’t hold up through the time it took me to take a few photos and eat it!  A hefty roll will be much better!  And it would make it portable!  Portable plants and portable Portabella Philly sandwich!

Restoring old cast iron…a messy job!!!

Crusty rusty gross looking skillets that have cooked with oven cleaner in a bag for over a week!

Crusty rusty gross looking skillets that have cooked with oven cleaner in a bag for over a week!

I have had a couple old cast iron skillets for a number of years.  I love them and use them often.  My little one is perfect for frying up a couple eggs.  The 9 inch pan has held the ingredients for a pineapple upside down cake many times through the years.   I recently came across a 12 inch pan and it was in really bad shape.  It was in an abandoned oven and had so much nasty stuff caked on there was no way it could be cleaned, or so I thought!

I have seen a couple threads on Facebook as well as pins on Pinterest on how to restore old cast iron.  I decided it was time to give it a try.  My pans could use some tidying up and the one I just got was in dire need of some help.

I knew I was going to have to use chemicals to do this job.  I simply do not have the physical strength to scrub at something like this repeatedly as I knew it would require.   I have tried the vinegar and soak method for oven racks with very poor success.  There was not going to be another way and I was resigned to it.  So I took the project outdoors and kept it quite contained.   I gathered my tools which were a big garbage bag, a pair of rubber gloves, and Easy Off Oven Cleaner.  I also made sure to have water nearby in case of contact with cleaner and I did it on a windless day!

I unfortunately didn’t think about pictures until after I had already sprayed the pans and let them sit.  The slimy mess in the bag is after they had sat for a week in the 80 degree sun, baking with the oven cleaner on them.   These first pictures are AFTER one attempt.  I had taken all the pans and placed them one at a time in the bag.  I would hold open the bag and use the plastic to turn the pan this way and that.  Then I put in the next pan and sprayed it.  I really soaked them with the oven cleaner.    I did this for all 3 skillets as well as a broiler pan I had found.   That broiler didn’t take the cleaner well.  I should have tested it on the bottom first!  Live and learn I always say.

I waited another 10 days and scrubbed all the goopy mess off again.  There was still some caked on nasty stuff on both the larger skillets.  So one more spray and another 10 days and today I gave them some attention again.  The 12 inch skillet is looking quite good.  All of the crusty mess is gone.  The small one has nothing left except a decent amount of rust.  The 9 inch pan still has some hard baked on mess so I will spray it one more time really soaking it and let it sit for 2 weeks.

I gave the pans a good soaking in a sink full of water with about 4 cups of vinegar in it.  The vinegar is supposed to help get rid of the rust.  I let them soak for about 90 minutes.  I took a steel wool pad to them and scrubbed some while rinsing them under running water.  I placed all the pans in the oven and turned it on to 250 degrees to let them dry and give them a slow heat.  After 5 minutes I took some paper towels and while using my lovely blue hot mitts I  rubbed Coconut oil all over each pan being liberal with the oil, but not having enough for it to pool anywhere.  I then placed both the skillets upside down in the oven and turned it on to 450.  WARNING!!!!  This causes smoke!!!  After about 20 minutes I had my fire alarm going off and had to open all the windows and I set the fan in front of the oven to blow the smoky air out the window!

I turned off the oven and again, using my mitts brought the pans out, wiped them thoroughly with paper towel which turned dark with the iron from the skillet.  I applied more of the oil and put them back into the oven while it was cooling.  I let them set there for over an hour.  I then wiped them again and made one more very thin application of oil and left them to sit in the oven upside down.

They sure look pretty now.  I can’t wait to make a BIG pineapple (or maybe another local fruit like blueberry) upside down cake really soon in that 12 inch pan.

This project cost less than $10.00.  I used 1 1/2 cans of Easy Off Oven Cleaner, 3 large plastic garbage bags, and 2 big hunks of steel wool.  My time was maybe 2 hours over the course of nearly a month.  Was it worth it?   Absolutely!  Griswold 12 inch skillets in good condition like this are selling for $175.00 to $450.00 on Ebay.   It really turned out to be a beauty.  It still has a little hue of rust coloring to it, but I think it’s as good as I am going to get it.  I can live with that.   Is it for sale?  NO WAY!  I have plans for this pan.

As a note:  This is the only harsh chemical I have used for cleaning since I have lived here.  I mostly use Shaklee’s Basic G and Basic H or the homemade vinegar cleaner I make with oranges.  If I could have figured out another way without the harsh chemical I would have.  If you know of a way that truly works without lots of muscle (scraping and using wire brushes and scraping) or without a lot of cost (sandblasting), please let me and all my readers know!  Thank you so much.